Natural Shelter Building: The Ultimate Guide To Wilderness Survival

Key Takeaways
- Knowing how to build a shelter from natural materials is a critical wilderness survival skill that can save your life
- Key principles for an effective survival shelter are insulation from the ground, protection from the elements, a small interior space, and a thick roof and walls
- The best location for a shelter has abundant building materials, is away from natural hazards, and has a source of water nearby
- Debris huts, lean-tos, wickiups, and tarp shelters are some of the most effective and practical shelter designs to master
- Always carry a few essential items like a knife, paracord, and tarp or emergency blanket to make shelter construction much easier
When you find yourself stranded in the wilderness, far from the comforts of civilization, shelter becomes your top priority. Without protection from the harsh elements, your chances of surviving more than a few hours plummet. But with the right knowledge and skills, you can transform the natural resources around you into a warm, dry, and secure refuge. In this ultimate guide, we'll dive deep into the art and science of natural shelter building for wilderness survival.
Why Shelter is Your #1 Survival Priority
In a survival situation, you can go for three weeks without food and three days without water. But without shelter, you may perish in as little as three hours. That's because exposure to wind, rain, snow, and extreme temperatures can rapidly lead to hypothermia, a life-threatening drop in your body's core temperature.
A well-built shelter acts as a buffer between you and the elements. It traps your body heat, blocks the chilling effects of wind and rain, and provides a sense of security and comfort. Shelter is so critical that survival instructors advise focusing on constructing or finding shelter before all other tasks, even before building a fire or finding food and water.

The Four Ws of Survival Shelters
To build an effective survival shelter, always keep the "Four Ws" in mind:
- Wind: Your shelter must block the wind to prevent heat loss from convection.
- Water: It should have a waterproof roof and elevated floor to stay dry.
- Wood: You need a source of wood for building materials and for a fire.
- Wiggle Room: Keep the interior just big enough to sit up and lie down comfortably. A smaller space is easier to heat.
Choosing the Right Shelter Location
Before you start building, take some time to scout for the best possible shelter location. Here's what to look for:
- Abundant building materials like fallen branches, leaves, and grasses
- Level ground, ideally slightly higher than the surrounding area
- Natural windbreaks and sources of insulation like rock walls or thick trees
- Proximity to a clean water source like a stream or lake
- Avoidance of natural hazards like widow-makers (dead trees or branches), insect nests, and flash flood zones
Debris Hut: The Quintessential Survival Shelter
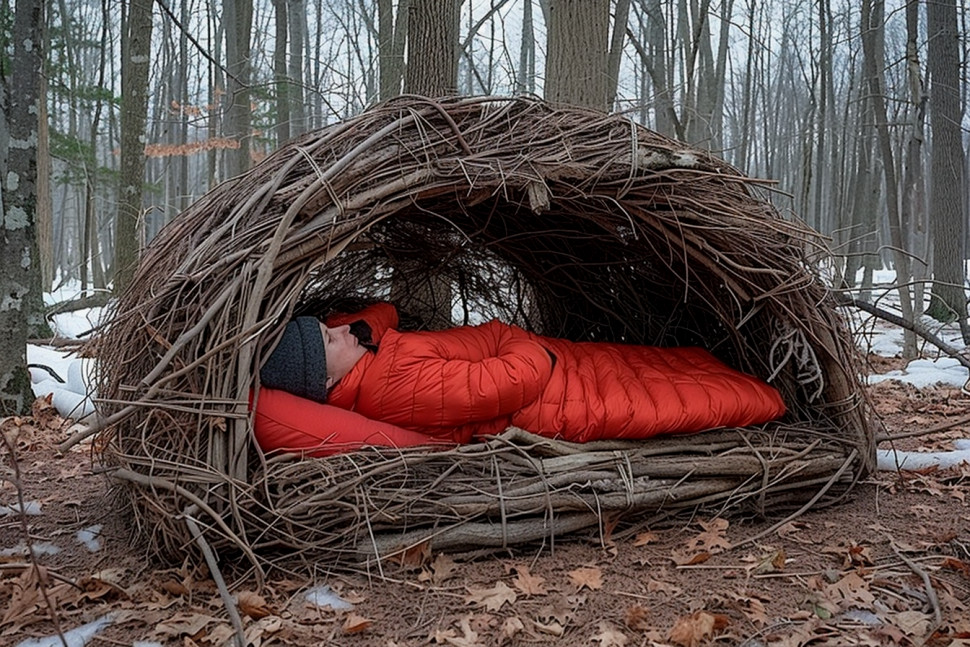
The debris hut is one of the most ancient and universal survival shelter designs. Requiring nothing more than natural materials and hard work to build, it's an excellent option for almost any environment.

Step-by-Step Debris Hut Instructions
- Find a long, sturdy branch for a ridgepole, about 9 feet long. Prop one end up on a stump, boulder, or in the crook of a tree about 3 feet off the ground.
- Lean sturdy branches against both sides of the ridgepole to create an A-frame. Space them about 6 inches apart.
- Pile smaller branches and sticks in the gaps between the A-frame ribs. Criss-cross them to create a lattice.
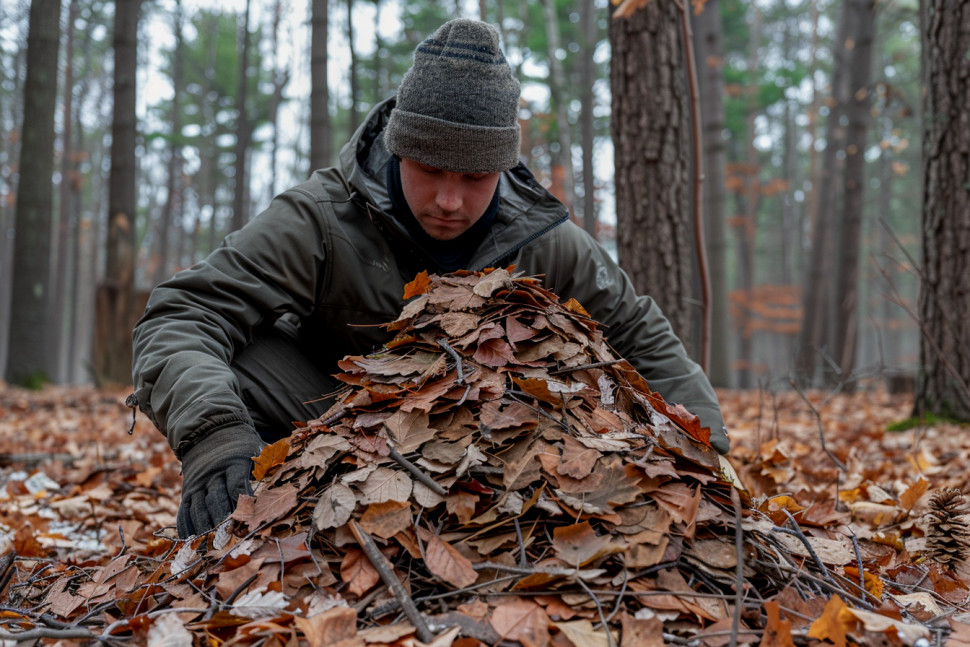
- Heap leaves, pine needles, grass, and other debris over the entire structure, at least 2 feet thick. Weave and stuff the material to minimize holes.
- Crawl inside and smooth out the floor. Build up a thick bed of leaves and pine needles to insulate you from the cold ground.
- Partially block the entrance with chunks of wood and mounds of leaves to keep out drafts.
Quick and Easy Lean-To
If you're short on time or energy, a simple lean-to can provide decent protection with minimal effort. All you need is a large fallen tree or a sturdy branch propped up on two supports.
Lean branches against your support at a 45-60 degree angle, leaving an opening on one side. Pile vegetation thickly on top of the angled branches. For extra weather resistance, prop a tarp, emergency blanket, or flattened bark shingles on the roof and walls.
A lean-to is open on one side, so build a fire in front of the opening to reflect heat into your shelter. Avoid building it with the open side facing the wind.

Wickiup and Teepee Designs
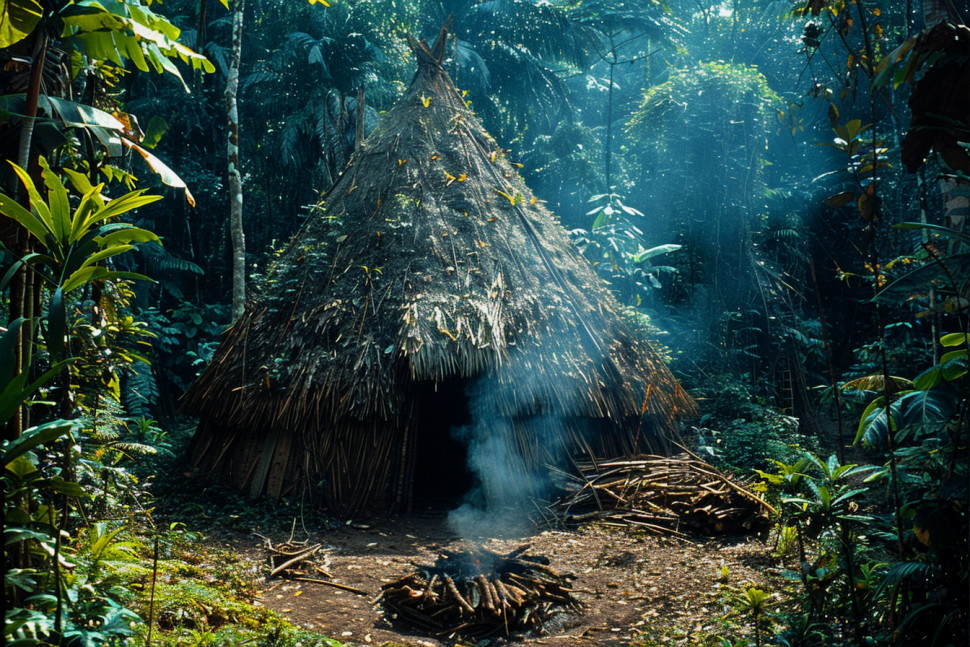
For a shelter with more headroom, try a wickiup or teepee. Both use a tripod framework of three poles lashed together at the top and fanned out at the bottom. Lean more poles against the tripod to make a conical framework.
For a wickiup, cover the framework with bark strips, grass mats, or other vegetation until you have a thick, overlapping layer. Leave a small door opening.
For a teepee, wrap a tarp, canvas, or animal hides around the poles. Secure the cover to the ground with rocks or stakes. Cut a slit for a door and a small smoke hole at the top for ventilation if you'll have a fire inside.
Tarp Shelters: The Ultralight Option
A lightweight tarp is one of the most versatile survival tools. With some paracord and creativity, you can quickly erect a variety of tarp shelter configurations:
- A-frame: Tie a ridgeline between two trees and drape the tarp over it. Stake out the corners.
- Lean-to: Tie the tarp to a ridgeline and stake the other edge to the ground on a diagonal.
- Tube tent: Fold the tarp in half around the ridgeline and stake out all 4 corners.
For maximum warmth and weather protection, build a small fire a few feet away from the open side of your tarp shelter. Pile vegetation or snow along the edges to seal out drafts.

Shelter Enhancements
Once you have a basic shelter built, add some creature comforts to increase your chances of survival:
- Insulation: Pile grass, leaves, moss, or pine boughs on the floor for bedding. Stuff vegetation into cracks and crevices.
- Heat reflector: Build your fire a few feet from the shelter opening. Place logs or rocks behind it to reflect more heat inside.
- Windbreak: Heap dirt, rocks, logs, or snow around the shelter's edges to block wind.
- Water collection: Tie the corners of a tarp or rain fly to trees and place a container underneath to collect rainwater.
Essential Shelter Building Tools
While you can build a shelter with nothing but your hands, having the right tools makes the job much easier. Always carry these items in your survival kit:
- Fixed-blade knife: For cutting branches, rope, and vegetation
- Folding saw: Cuts through thick branches much faster than a knife
- Paracord: Lash poles together and tie down tarps. Much stronger than string.
- Tarp or emergency blanket: Instant waterproof roof for any shelter

Survival Techniques for Wilderness Camping
When embarking on wilderness camping trips, it is crucial to master various survival techniques to ensure a safe and enjoyable experience. Building a shelter using natural materials, starting a fire without matches, and foraging for food are essential skills to possess. Additionally, knowing how to purify water from natural sources and navigate using a map and compass are vital for wilderness survival. By learning and practicing these techniques, campers can confidently handle unexpected challenges in the great outdoors. Proper preparation and knowledge of survival tactics are key to thriving in the wilderness.
Finding Your Way Without a Compass: the Ultimate Guide to Never Getting Lost!
When exploring the great outdoors, knowing how to navigate without a compass is a valuable skill. This comprehensive guide provides essential tips and techniques for finding your way using natural landmarks and celestial navigation. By learning to read the signs of nature, you can confidently traverse unfamiliar terrain without the need for modern tools. Whether you're hiking, camping, or simply enjoying nature, mastering these navigation methods ensures you'll never be lost again. Embrace the adventure and empower yourself with the knowledge to navigate like a true outdoorsman.
Conclusion
The ability to build a warm, dry, and secure shelter from natural materials is one of the most important wilderness survival skills. By understanding the key principles of shelter design and practicing a few simple techniques, you can dramatically increase your odds of surviving a crisis in the wild.
Remember, a survival shelter doesn't have to be pretty or perfect. Speed is more important than aesthetics. Focus on the four Ws - wind, water, wood, and wiggle room - and utilize the natural resources around you.
Always be prepared by carrying a few essential shelter tools in your survival kit. A good knife, saw, paracord, and tarp or emergency blanket can make the difference between a miserable night and a restful one.
Most importantly, never underestimate the power of a positive mental attitude. With the will to survive and the knowledge of natural shelter building, you can overcome incredible challenges and make it out of the wilderness alive.
